Warning
This method has been superseded. The new way can be found at https://pixelrobots.co.uk/2018/10/the-new-and-improved-way-to-encrypt-an-azure-vm-running-windows/
In this Article, I am going to walk through how to encrypt your Azure Virtual Machines including ones with managed disks. By following this guide you will be able to stop the High Severity Alerts from showing in Azure Security Center and be able to use Azure Backup to backup your VMs.
Configure Encryption Prerequisites
For us to be able to encrypt VM’s we have to meet a few prerequisites first. Luckily Microsoft provides us with a script that will create all the necessary Azure resources. This will include a Key Vault if you do not specify an existing one. One thing to note is that the Key Vault must be in the same region as the VM’s you want to be encrypted. The script will also create an Azure Active Directory (AAD) Application. This application will be used to write the secrets to the Key Vault. So let’s start preparing Azure for Encryption.
Before you can go ahead with the below you will need to have the Azure RM PowerShell module installed. You can go here to find out how.
Download the script
Open PowerShell with Elevated permissions and navigate to a location you would like to store the script. In my case, I will be using c:\Scripts
Now we can use the following commands to download the PowerShell script from Microsoft. It’s hosted on GitHub.
| invoke-webrequest https://raw.githubusercontent.com/Azure/azure-powershell/master/src/ResourceManager/Compute/Commands.Compute/Extension/AzureDiskEncryption/Scripts/AzureDiskEncryptionPreRequisiteSetup.ps1 -Outfile AzureDiskEncryptionPreRequisiteSetup.ps1 |

Run the Script
Before we run the script we need to find out your Azure Subscription ID. We will need to login to the Azure Portal using the following command.
| Login-AzureRmAccount |
Enter your Azure admin credentials.
You can use the following command to get a list of your subscriptions and their ID’s
| Get-AzureRmSubscription |

Take a note of your subscription ID, you will need it for the next command. In the command below. Change the -SubscriptionID, -ResourceGroupName, -KeyVaultName, -location, and -AADAppName to your values.
| ./AzureDiskEncryptionPreRequisiteSetup.ps1 -SubscriptionID "e03cfa2a-c5a9-4f4e-afbd-462c181f761e" -ResourceGroupName "PixelEncrypt" -KeyVaultName "PixelEncrypt" -location "UK South" -AADAppName "PixelEncrypt" |
You will see in the below image. That you need to take a note of the aadClienID, aadClientSecret, DiskEncryptionKeyValueUrl, and keyVaultResourceId. Save the information somewhere safe and then press enter.

Create a Key Encryption Key
Navigate to the Azure Portal
Click All Services and find Key Vaults

Click on your Key Vault

Click Keys and then click Generate/Import

Enter a Name for your key and click Create

Click on your newly created key, then click on the version that is enabled and make a copy of the Key Identifier

That’s all of the prerequisites sorted. Time to actually encrypt a Virtual Machine.
Encrypt An Azure Virtual Machine
If you are following on from above you do not have to connect back up to Azure. If you need to connect up just follow the steps above under the download script section. Just stop before you download the script.
Under your VM and Disk section in the Azure portal, you will see that we have no disk Encryption.

Let’s change that. In the Elevated PowerShell window copy the bellow script. Change the parameters to your values from above.
| $resourceGroupName = "PixelRobotsLab" | |
| $vmName = "PixelTest" | |
| $aadClientID = "54d64d1f-9dbf-4be3-92bc-30efbbe4f18f" | |
| $aadClientSecret = "af031e75-c020-4ecd-89e6-74be50030bb7" | |
| $diskEncryptionKeyVaultUrl = "https://PixelEncrypt.vault.azure.net" | |
| $keyVaultResourceId = "/subscriptions/e03cfa2a-c5a9-4f4e-afbd-462c181f761e/resourceGroups/PixelEncrypt/providers/Microsoft.KeyVault/vaults/PixelEncrypt" | |
| $KEKUrl = "https://pixelencrypt.vault.azure.net/keys/VMEncrypt/9769d3510bbb45a9a0f2843b9a5eaaff" | |
| Set-AzureRmVMDiskEncryptionExtension -ResourceGroupName $resourceGroupName -VMName $vmName -AadClientID $aadClientID -AadClientSecret $aadClientSecret -DiskEncryptionKeyVaultUrl $diskEncryptionKeyVaultUrl -DiskEncryptionKeyVaultId $keyVaultResourceId -KeyEncryptionKeyVaultId $keyVaultResourceId -KeyEncryptionKeyUrl $KEKUrl -VolumeType All |

This will take some time and your VM will reboot. So make sure you do it in a maintenance window. Once the encryption has finished. You can navigate back to the disk section under your VM in the Azure Portal and you will see that the disk is encrypted.

Set permissions for the Backup Management Service
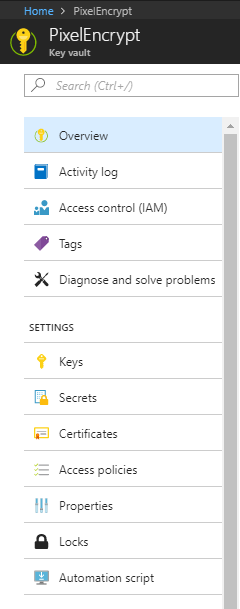
In the Azure Portal Navigate to Key Vault and then click you Key Vault. Locate Access Policies and click it.
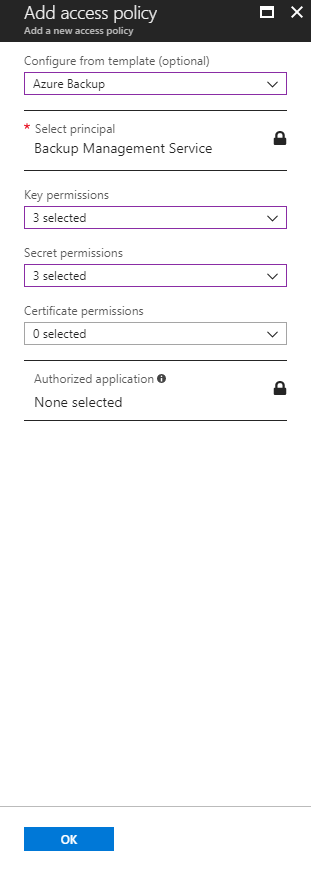
Click the Add new button

Under Configure from template select Azure Backup and click OK
Now click the Save button.

You should now be able to
Decrypt Azure Virtual Machine
If you need to remove the disk encryption you can use the following command. Just make sure you change it to match your details.
| Disable-AzureRmVMDiskEncryption -ResourceGroupName "PixelRobotsLab" -VMName "PixelTest" -VolumeType All |
That’s it! You have now enabled Encryption using the Key Encryption Service, encrypted a Virtual machine, and given access to the backup service on your KEK. I hope you found this article helpful. If you have any questions please leave a comment below.


2 Comments
JC · March 28, 2019 at 4:06 pm
Can you please update the script oath on Github – getting a 404 not found error 🙁
Thanks,
J
Pixel Robots. · March 28, 2019 at 4:21 pm
Hello, Thanks for the message. The script is one from Microsoft. They have created a new way to encrypt VMs in Azure now.
I have a blog post on it at https://pixelrobots.co.uk/2018/10/the-new-and-improved-way-to-encrypt-an-azure-vm-running-windows/
Hopefully, that helps.