I have been chipping away at extending KubeBuddy beyond the CLI for a while. This week I shipped two things that are genuinely useful if you run Headlamp as your Kubernetes dashboard, which you should. The first is the KubeBuddy Headlamp plugin, which brings the full KubeBuddy check catalog (excluding the Cloud provider best practices) into Headlamp without touching your cluster configuration. The second is the Headlamp Theme Builder, a Headlamp plugin and browser-based design tool that turns your brand colours into a ready-to-install Headlamp theme plugin in minutes.
The KubeBuddy plugin came out of a simple frustration. I wanted to scan a cluster without leaving Headlamp, without installing the CLI, and without switching back and forth between the dashboard and a terminal. The Theme Builder started differently. I wanted a branded theme for where I work, and then I started thinking about how much engineers enjoy customising their tools. If Oh My Posh has taught us anything, it is that people will absolutely spend time making things look exactly right. So why not make it just as easy to theme Headlamp?
Both are available now. Here is what they do, but first.
What is Headlamp
Headlamp is an open source, extensible Kubernetes dashboard originally built by Kinvolk, now part of Microsoft. It has been donated to the CNCF as a sandbox project and is the dashboard of choice for the Kubernetes SIG UI. It gives you a clean UI for browsing and managing Kubernetes resources across clusters, and it runs as a desktop app, in-cluster, or via a local proxy. What sets it apart from something like the standard Kubernetes Dashboard is its plugin system. You can extend Headlamp with additional views, tools, and functionality, and because it is open source, anyone can build and publish a plugin. That is exactly what both of these releases are.
KubeBuddy Headlamp Plugin
The KubeBuddy Headlamp plugin runs browser-side Kubernetes checks against the active cluster using the resource data Headlamp can already read. There is nothing to deploy into the cluster. No operators, no agents, no CRDs. Tools like Trivy Operator and Kubescape require in-cluster components to function. KubeBuddy works entirely from what Headlamp can already see.
This first release ships as part of KubeBuddy v0.0.31 and includes all the Kubernetes checks from that version. The plugin version and the KubeBuddy checks version are recorded separately, so it is always clear exactly which checks you are running.

What it checks
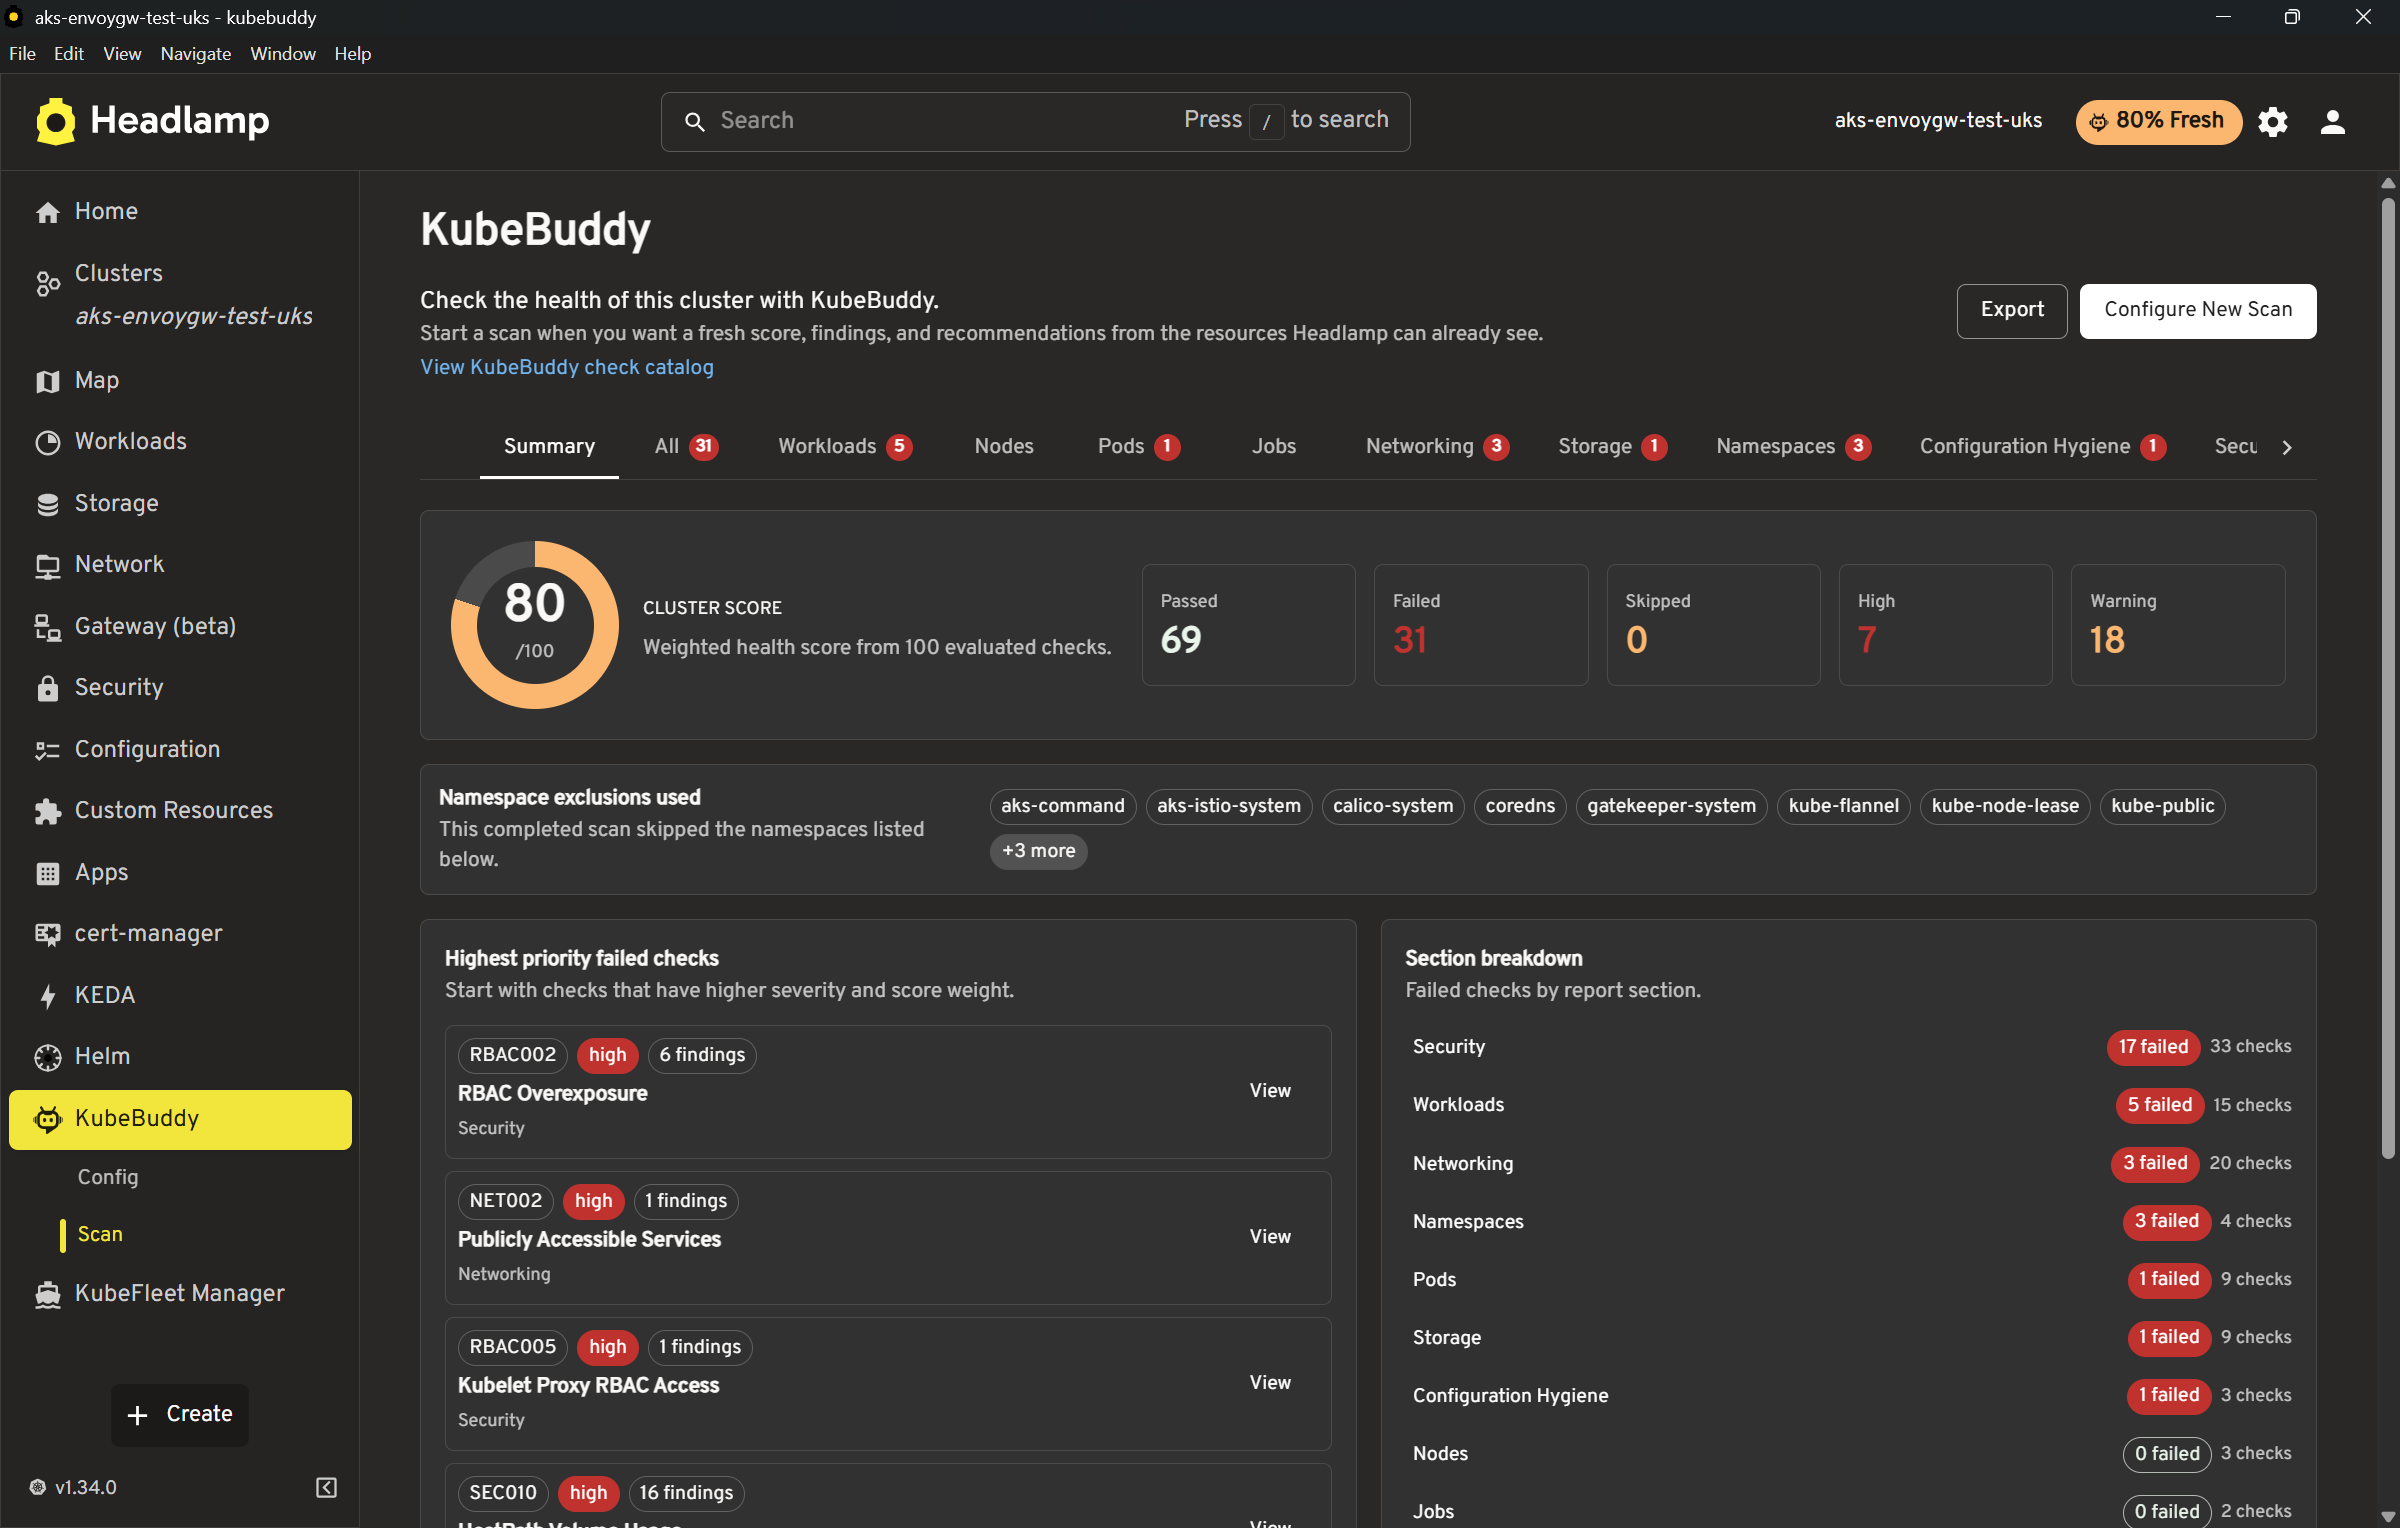
The check catalog covers workloads, pods, nodes, networking, storage, namespaces, configuration hygiene, security, RBAC, and events. That mirrors the existing KubeBuddy Kubernetes check catalog, so if you have used the CLI you will recognise the findings.
After a scan you get a summary score with severity counts broken down by critical, warning, and info. Findings are grouped into cards by category, each with a recommendation and a direct link to the affected resource in Headlamp. You can filter by namespace, check ID, and severity, and export the full results to CSV or JSON. The plugin also supports importing and exporting kubebuddy-config.yaml for the settings it can honour browser-side.
One thing I noticed during testing is how well the resource links work. Clicking through from a finding drops you directly onto the relevant Headlamp resource page, which makes triage significantly faster than cross-referencing a CLI report against a separate dashboard view.
What it does not include
The browser-only scope is a real constraint worth understanding upfront. The plugin cannot run AKS or GKE checks that require Azure or Google Cloud API calls, Prometheus checks, or anything that depends on kubectl or PowerShell execution. Those still need the CLI. The scan also stops if you navigate away or refresh the page mid-run, so this is not a background monitoring tool. It is a deliberate, on-demand scan while you are actively reviewing the cluster.
For most audit and review workflows that is absolutely fine. For continuous compliance monitoring you still want the CLI in a pipeline.
Installing it
The simplest route is through the Headlamp Desktop Plugin Catalog. Open Headlamp Desktop, go to Plugin Catalog, search for KubeBuddy, and click Install. Restart if prompted, then open KubeBuddy from the cluster sidebar.
For in-cluster Headlamp installs using the plugin manager, add the following to your Helm values:
|
1 2 3 4 5 6 7 8 9 10 11 12 13 |
config: watchPlugins: true pluginsManager: enabled: true configContent: | plugins: - name: kubebuddy-headlamp-plugin source: https://artifacthub.io/packages/headlamp/kubebuddy/kubebuddy-headlamp-plugin version: 0.1.0 installOptions: parallel: true maxConcurrent: 2 |
Apply the updated values with helm upgrade, wait for the plugin manager to sync, and KubeBuddy will appear in the sidebar automatically.
You can also install it with the Headlamp plugin CLI if you prefer a one-liner:
|
1 |
npx @kinvolk/headlamp-plugin install https://artifacthub.io/packages/headlamp/kubebuddy/kubebuddy-headlamp-plugin |
Headlamp Theme Builder
The second release is a different kind of tool. Headlamp Theme Builder is a browser-based design tool that lets you build a Headlamp theme with a live preview and then download a ready-to-install plugin zip. No local build step, no Node environment needed.
The use case is straightforward. If you want Headlamp to match your team’s brand colours, or you need to white-label the dashboard for a client environment, the builder removes the need to hand-write a plugin scaffold and figure out which MUI tokens do what.
How the builder works
You adjust colours in the left panel and see them applied immediately to a live Headlamp-style preview on the right, covering the navbar, sidebar, cards, and buttons. Light and dark variants are edited independently, and there are separate terminal and ANSI colour controls for the log views.
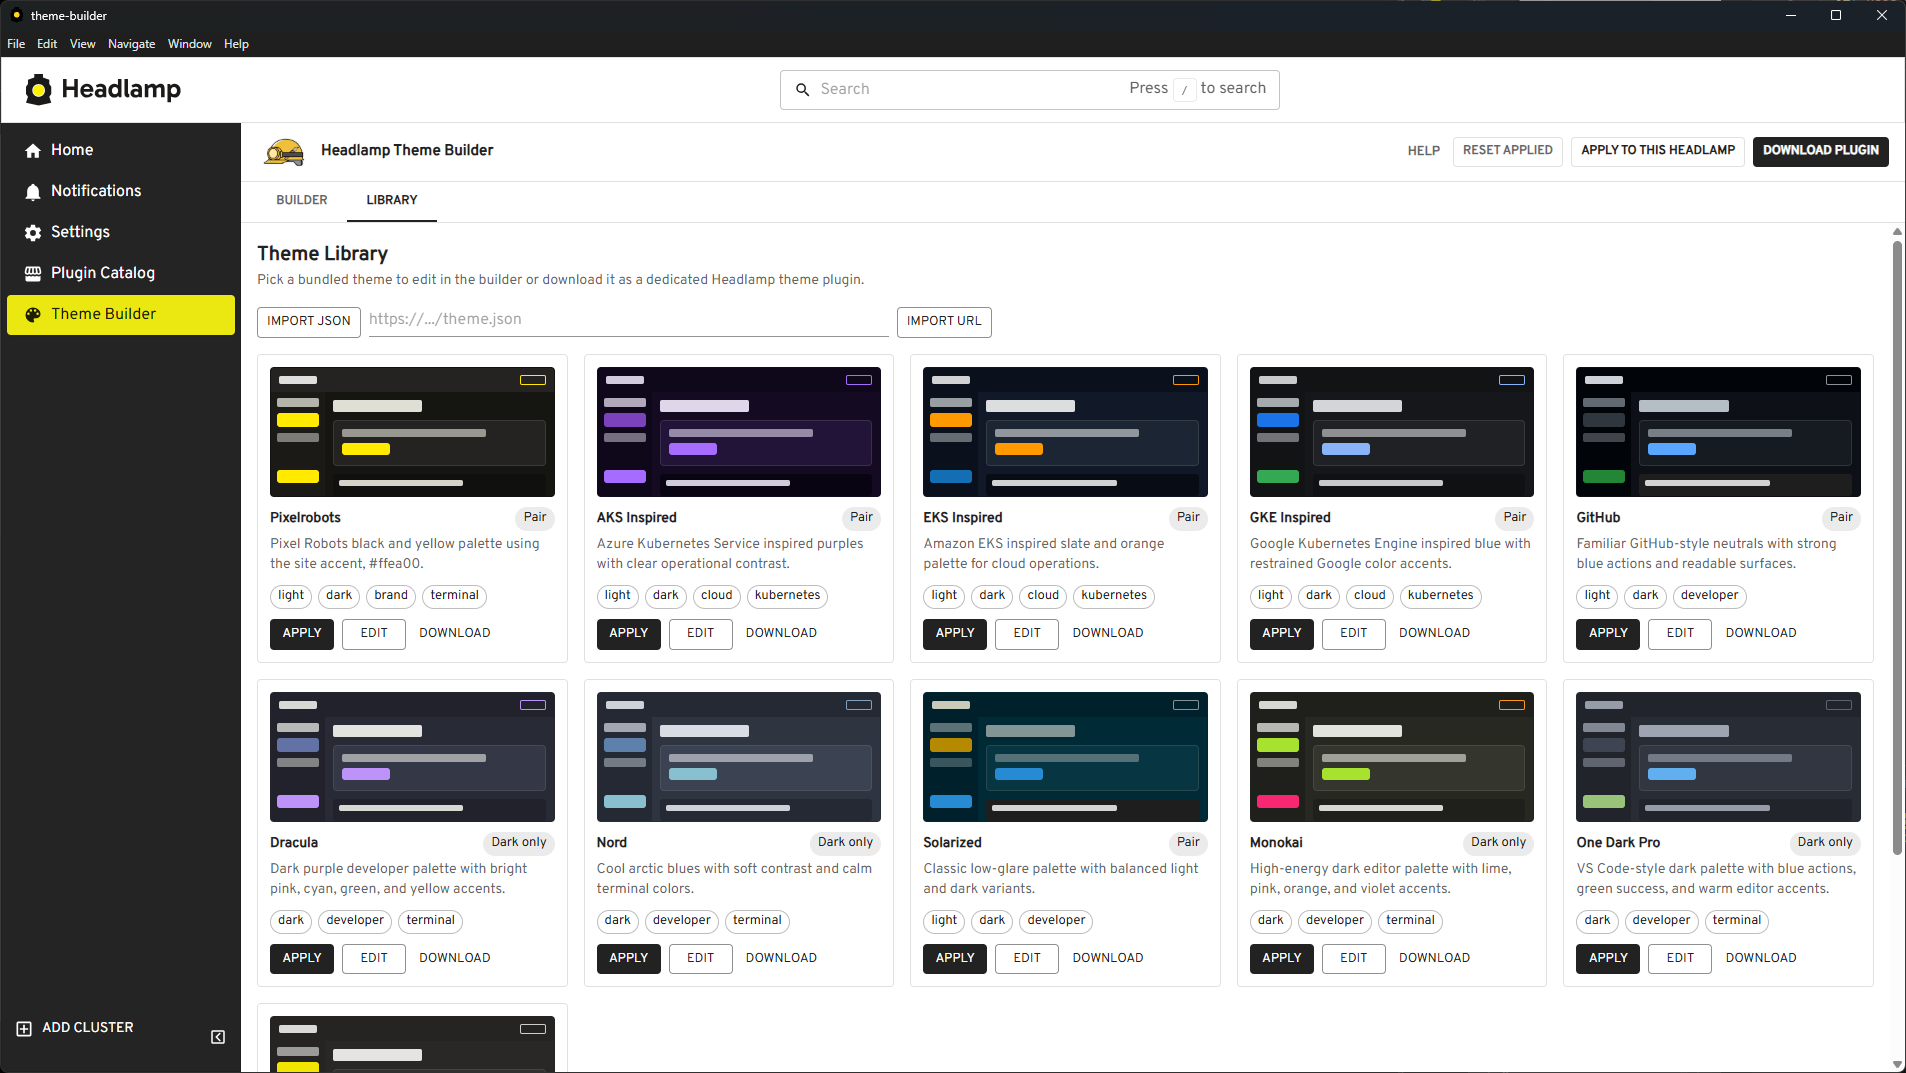
The theme library is a useful addition. You can load the bundled public themes, import a theme from a local JSON file, or pull one in from any public URL that allows CORS. The share link feature is particularly handy when collaborating; it encodes your current light and dark state into a URL so you can hand it to a colleague without exporting a file.
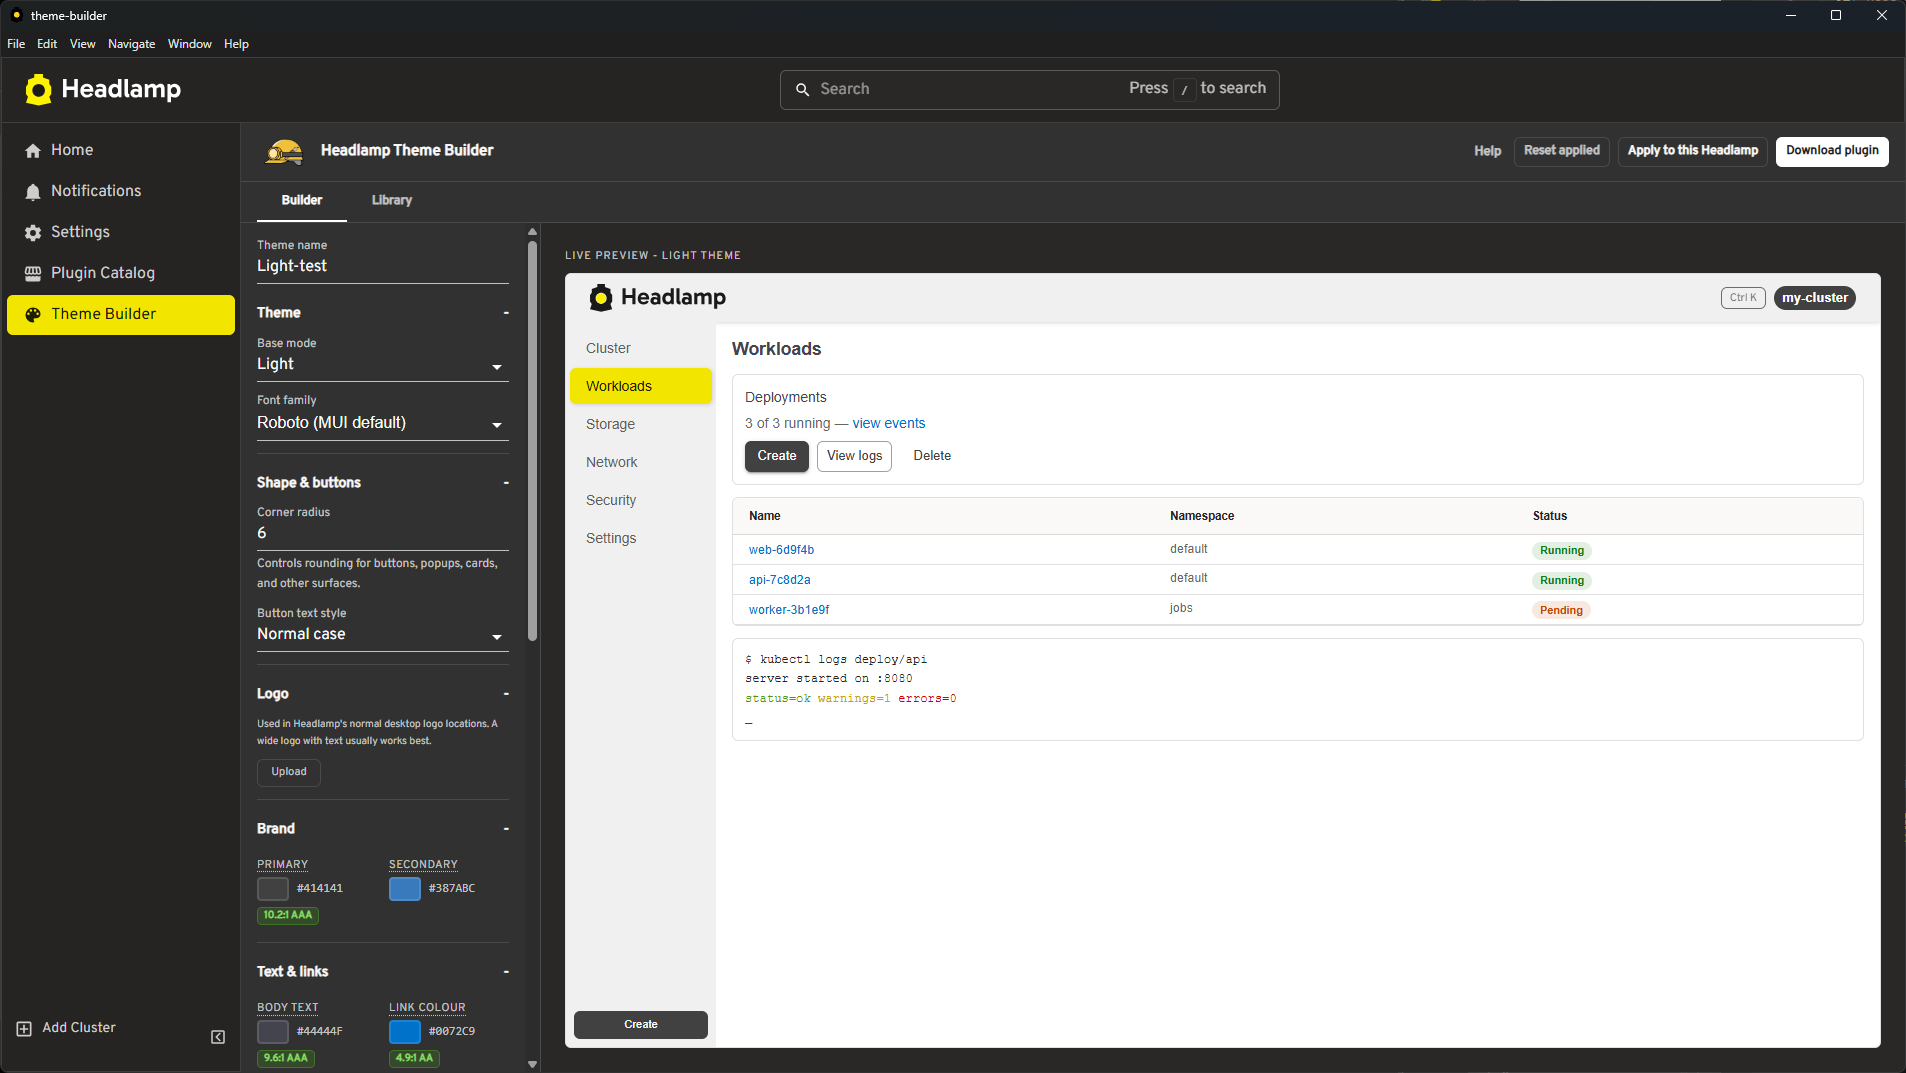
Before downloading, you set the plugin name, version, description, and author. If you upload a logo, it gets embedded into the generated plugin and registered with Headlamp automatically.
Installing the generated plugin
The downloaded zip is ready to use without any build step. Unzip it and copy the plugin folder to your Headlamp user-plugins directory.
On Windows that is %APPDATA%\Headlamp\Config\user-plugins\<plugin-name>\. On Linux or macOS it is ~/.config/Headlamp/Config/user-plugins/<plugin-name>/. Restart Headlamp and select your theme under Settings > General > Theme.

Give Them a Go
That is the KubeBuddy Headlamp plugin and the Headlamp Theme Builder. Two different tools, both built to make Headlamp more useful for the people running it day to day. One gives you structured insight into what your cluster is actually doing, the other gives it some personality.
Both are available now, both are free, and neither requires anything complicated to get running. Give them a try and let me know how you get on. If something does not work the way you expect, or you have ideas for improvements, raise an issue on GitHub or drop me a message. I am always keen to hear how people are using these and what would make them better.


0 Comments