This article is the first in a 2 part series regarding Azure Kubernetes Service (AKS) clusters. Part 1 (this one) will show you how to create an AKS cluster and connect to it via the cloud shell. It will also show you how to connect to the Kubernetes dashboard.
Part 2 will show you how to deploy a simple application, test the application, monitor the health and logs, and delete the cluster.
I am starting to investigate using AKS for a project at work and thought the best thing to do is to start playing with it and document my journey. So look out for more articles as I go further
Create an AKS Cluster
In the Azure portal click on the green +. Then type Kubernetes Service and press Enter.

Click on the Kubernetes Service icon Create.

You will now need to fill in some information to create the Kubernetes cluster.
Lets start with the Basics tab.
- Under Project Details pick the Subscription you want to use and either create a new Resource group or use an existing.
- For Cluster Details enter a name for your Kubernetes Cluster, select the Azure region you want the cluster to reside in. You will also be able to pick the Kubernetes version and then you can enter a DNS name for your AKS cluster.
- The last section on this tab is Scale. Here you can pick the size of your nodes and also how many nodes you want in your cluster. (You can change the node count after the cluster has been deployed.)
Once configured you should have something like in the image below. Click on Next: Authentication when your happy to move on.

Now for the Authentication tab.
- Here you can either create a new Service principal or Configure to use an existing one. When using an existing one, you will need to provide the SPN client ID and secret.
- If your running in production you will probably want to click Yes to Enable RBAC. But as this is just in my lab I am going to click no.
Once your happy with your settings click on Next: Networking.

The Networking tab.
- Leave the HTTP application routing set to Yes. This will configure an integrated ingress controller with automatic public DNS name creation. If you do not want this click No.
- You could just leave the default Basic networking, but you may find that the AKS cluster will overlap the subnets you have already set up. So I would click Advanced. Here you can either pick or create a new Virtual network, Cluster subnet, Kubernetes service address range, Kubernetes DNS
service IP address, and Docker Bridge address.
To move on to the next tab click Next: Monitoring.

On to Monitoring
- I would always leave the default Yes for Enable container monitoring.
Next, you can either use an existing Log Analytics workspace or Create a New one.
To move on click Next: Tags.

Tags!
- Enter any Tags you are using in your environment.
Click Next: Review + create to move on to the last tab.

Time to create your AKS cluster
- Azure will validate your settings. Once it’s passed, just give it a review yourself and then click Create.

It will take a few minutes for the cluster to be created and ready to use. Once its created navigate to the resource group you used for the AKS cluster. You will then be able to click on the AKS resource to see the AKS cluster dashboard.

Connect to the AKS Cluster and view the Kubernetes Dashboard
Connect to the cluster
Open up the Azure Cloud Shell and make sure you are in the Bash console.

You can use the following command to configure Kubectl to connect to your Kubernetes Cluster. Just make sure you change the –resource-group and –name to match yours.
| az aks get-credentials --resource-group PixelContainers --name PixelCluster |

To verify your connected you can use the following command.
| kubectl get nodes |

Connect to the Kubernetes Dashboard
To connect to the Kubernetes dashboard you have to use Azure
Open up PowerShell as an administrator and type the following command to install the kubectl to cli.
| az aks install-cli |

Follow the instructions so kubectl.exe can be found.
Now enter the following command to connect to Azure.
| az login |
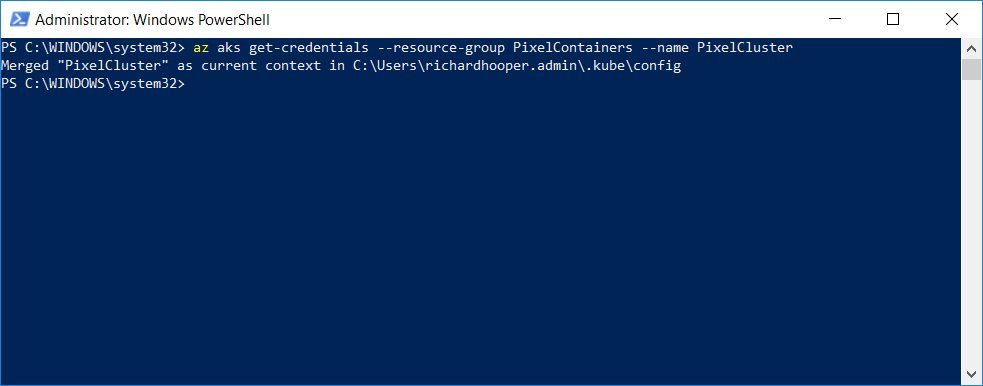
Once logged in use the following command to configure Kubectl to connect to your Kubernetes Cluster. Just make sure you change the –resource-group and –name to match yours.
| az aks get-credentials --resource-group PixelContainers --name PixelCluster |
Now to open up the Kubernetes Dashboard use the following command. Just make sure you change the –resource-group and –name to match yours.
| az aks browse --resource-group PixelContainers --name PixelCluster |

In a few seconds

That’s it you have now created your first AKS cluster, connected to it via the Cloud Shell and also connected to the Kubernetes dashboard.
In Part 2 of this post
I hope you found this article helpful. If you have any questions please reach out in the usual methods.


0 Comments