In a previous blog, which you can read here, I showed you how to create an Azure file share. So now it’s about time I did a guide on how to actually back up the Azure file share. Below I will walk through the steps you need to take to accomplish this task. Before I show you how to backup your file share lets look at how Azure File Share backup works and some key features.

Key features
• Discover unprotected file shares: Utilize the Recovery Services vault to discover all unprotected storage accounts and file shares within them.
• Backup multiple files at a time: You can back up at scale by selecting multiple file shares in a storage account and apply a common policy over them.
• Schedule and forget: Apply a Backup policy to automatically schedule backups for your file shares. You can schedule backups at a time of your choice and specify the desired retention period. Azure Backup takes care of pruning these backups once they expire.
• Instant restore: Since Azure Backup utilizes file share snapshots, you can restore just the files you need instantly even from large file shares.
• Browse individual files/folders: Azure Backup lets you browse the restore points of your file shares directly in the Azure portal so that you can pick and restore only the necessary files and folders.
From: https://azure.microsoft.com/en-gb/blog/introducing-backup-for-azure-file-shares/
Now you know how Azure Files Share backups work and the key features lets move on to the how to.
Lets Backup the Share
Creating an Azure Recovery Services Vault
Before you can backup your Azure File Share you need an Azure Recovery Services Vault. To create one in the Azure Portal click on All services and search for Recovery Services Vault and click it.

Now click on Add

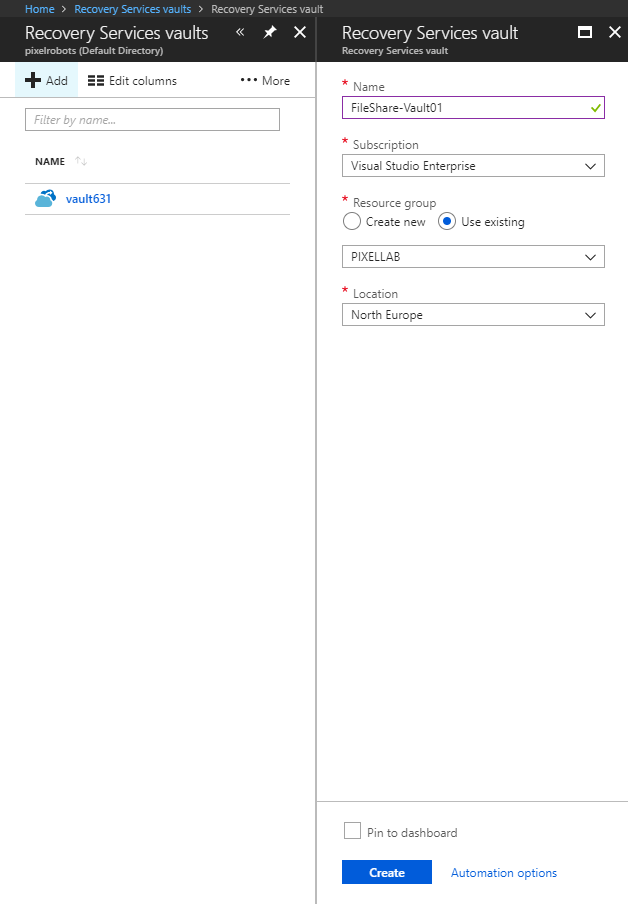
Enter a Name, pick you Subscription, select to either create a new Resource Group or use an existing, and finally select the location. Make sure you select the same location as your Azure File Share. Then click Create
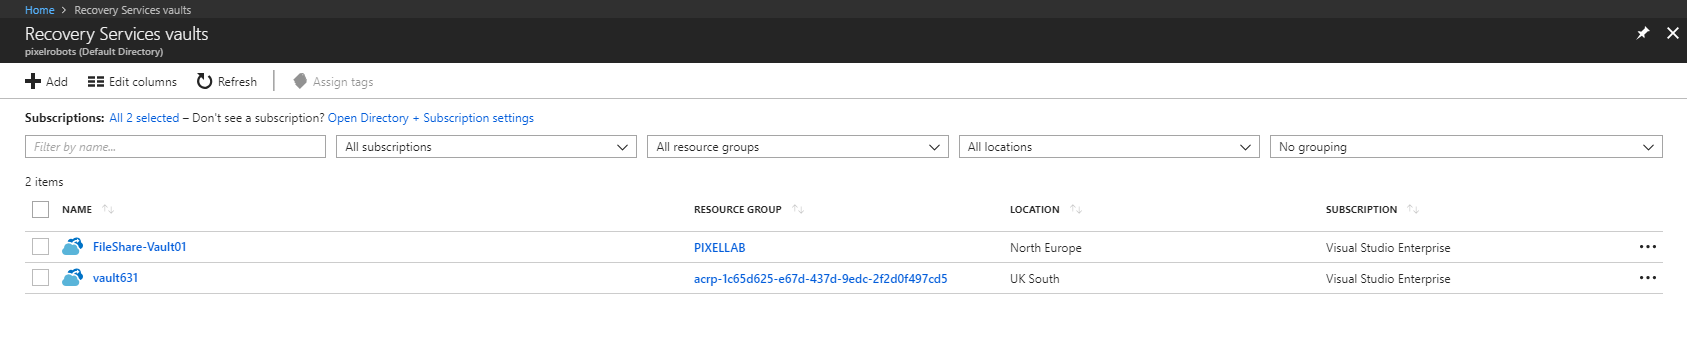
You should now see your newly created Recovery Services Vault, click it.
Now click Backup

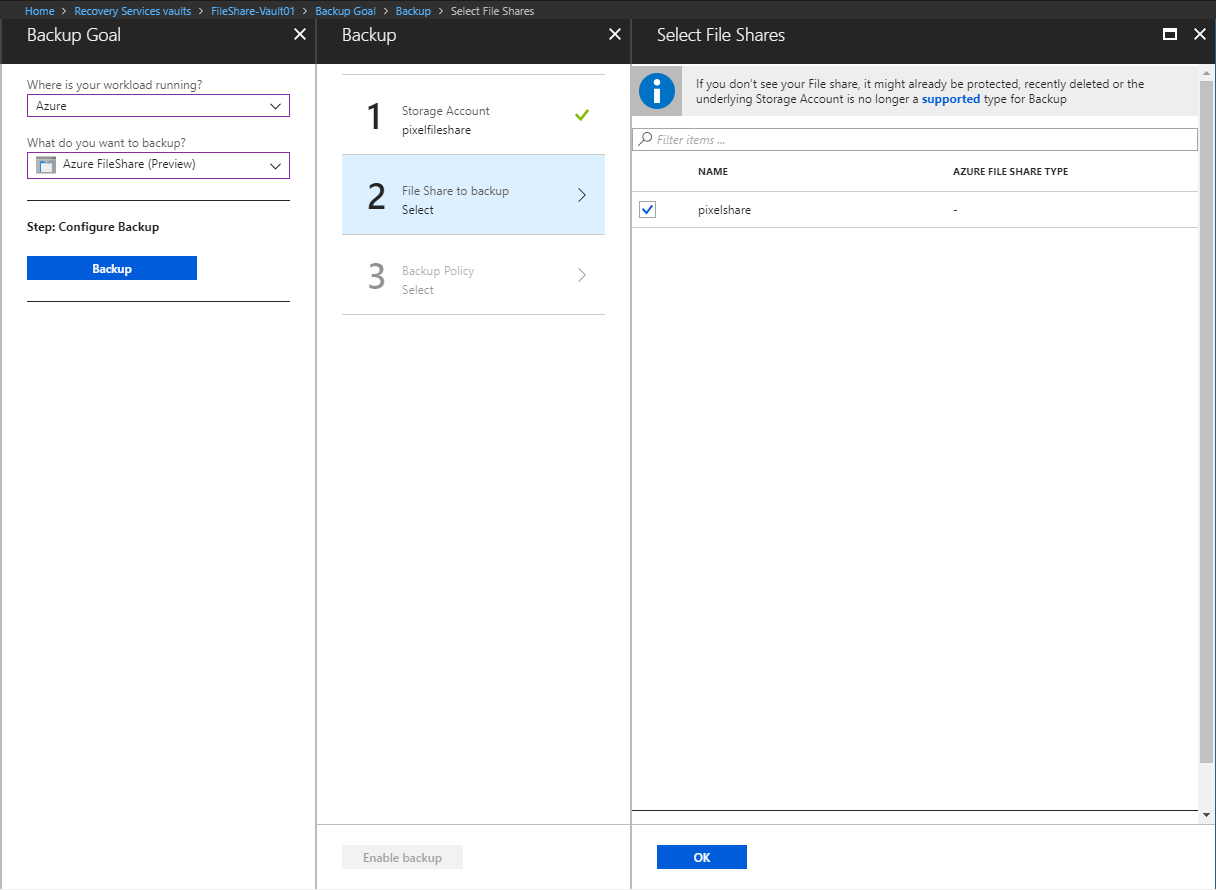
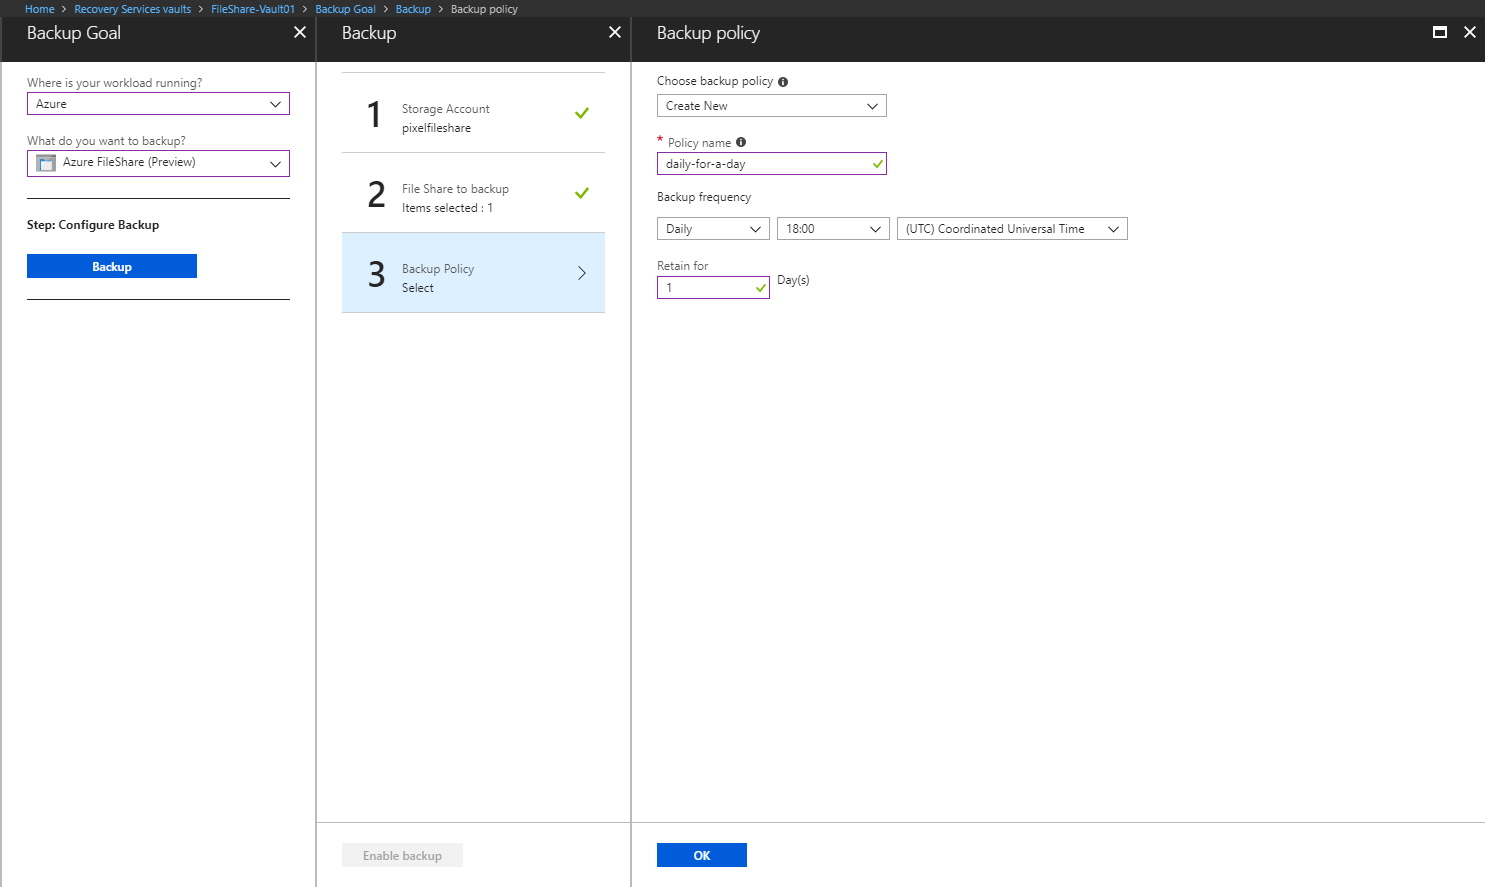
In the Backup Goal blade click on the What do you want to backup? drop down menu and select Azure FileShare and then click the Backup button.

Azure Backup will start to discover the storage accounts in the same location. Once it has finished click on the storage account with the file share in and click OK

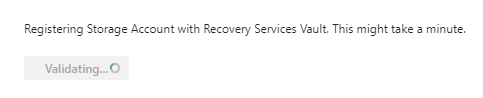
The storage account will now be registered with the Recovery Services Vault
Once that has finished you will be able to select the File Share you want to backup. Put a tick in the box and press OK.
Now you can configure the Backup Policy You can either create a new one or use an existing. Just enter a Policy name and set the Backup frequency and how many days you would like to Retain the backup for. Then click OK.
Click Enable backup

Azure will now go off and deploy this new solution.
Check your backup
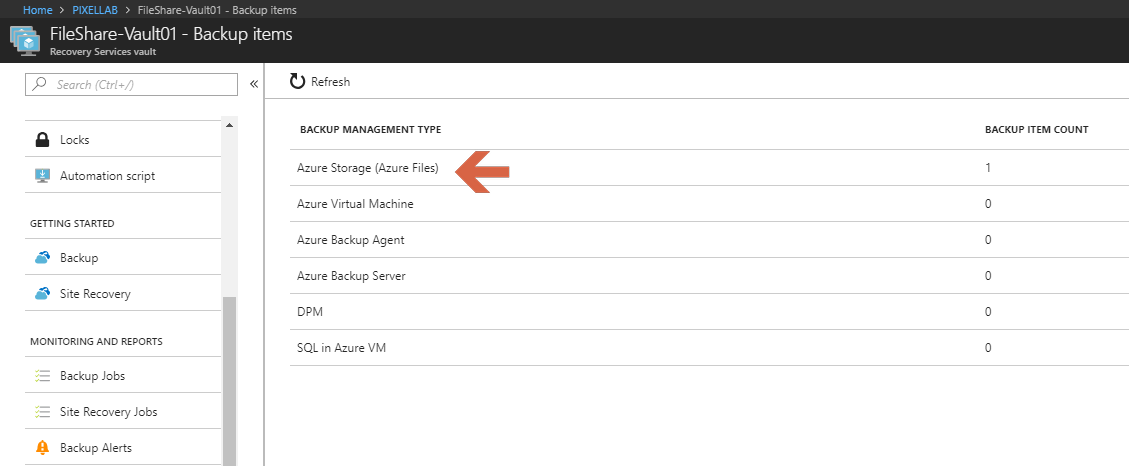
After some time the deployment will finish. Navigate to the Recovery Services Vault you created earlier and click on Backup items.

Now click on Azure Storage (Azure Files)
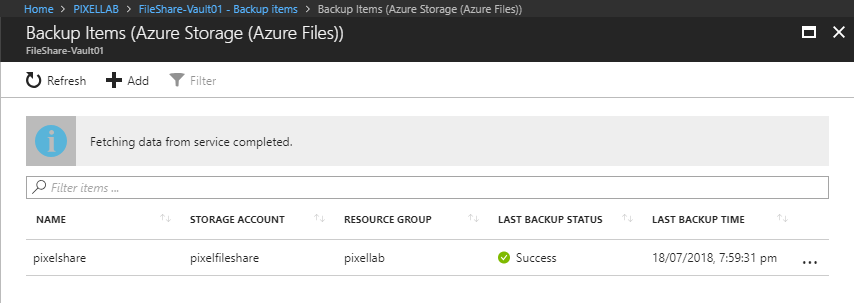
You will now see a list of the Azure File Shares you are backing up. As the first backup has not happened yet you will see a warning.

Click the … and click Backup now this will kick off a backup and get rid of the warning.

If you want to, you can enter a date to save the backup till. And then click OK.

The backup will now start, depending on how many files you are backing up this could take some time. In the Backup Items blade click Refresh to see an update to the backup progress.

Once the backup has finished you will see a screen similar to the one below.
And there you have it you have backed up your Azure File Share in another article I will go through the process of Restoring from the backup. As usual, any questions please reach out.


0 Comments