In this article, I am going to walk through how to use the Azure Cloud Shell to download the Azure Stack tools to your cloud drive and then import the Azure Stack Policy module. After we have imported the module the guide goes on to show you how to apply the policy to both a whole subscription and also just a resource group. To finish off the guide shows you how to remove the policy from both the resource group and subscription.
You may find this useful if you are planning on developing applications for both Azure and Azure Stack but currently, do not have a developer kit setup or own the Azure Stack appliance.
Install the Module
Navigate to shell.azure.com
Select what directory you would like to work with.

Change from the bash shell to the PowerShell shell

Click Restart

Use the following command to find the location of your persistent cloud drive storage
| get-cloudrive |
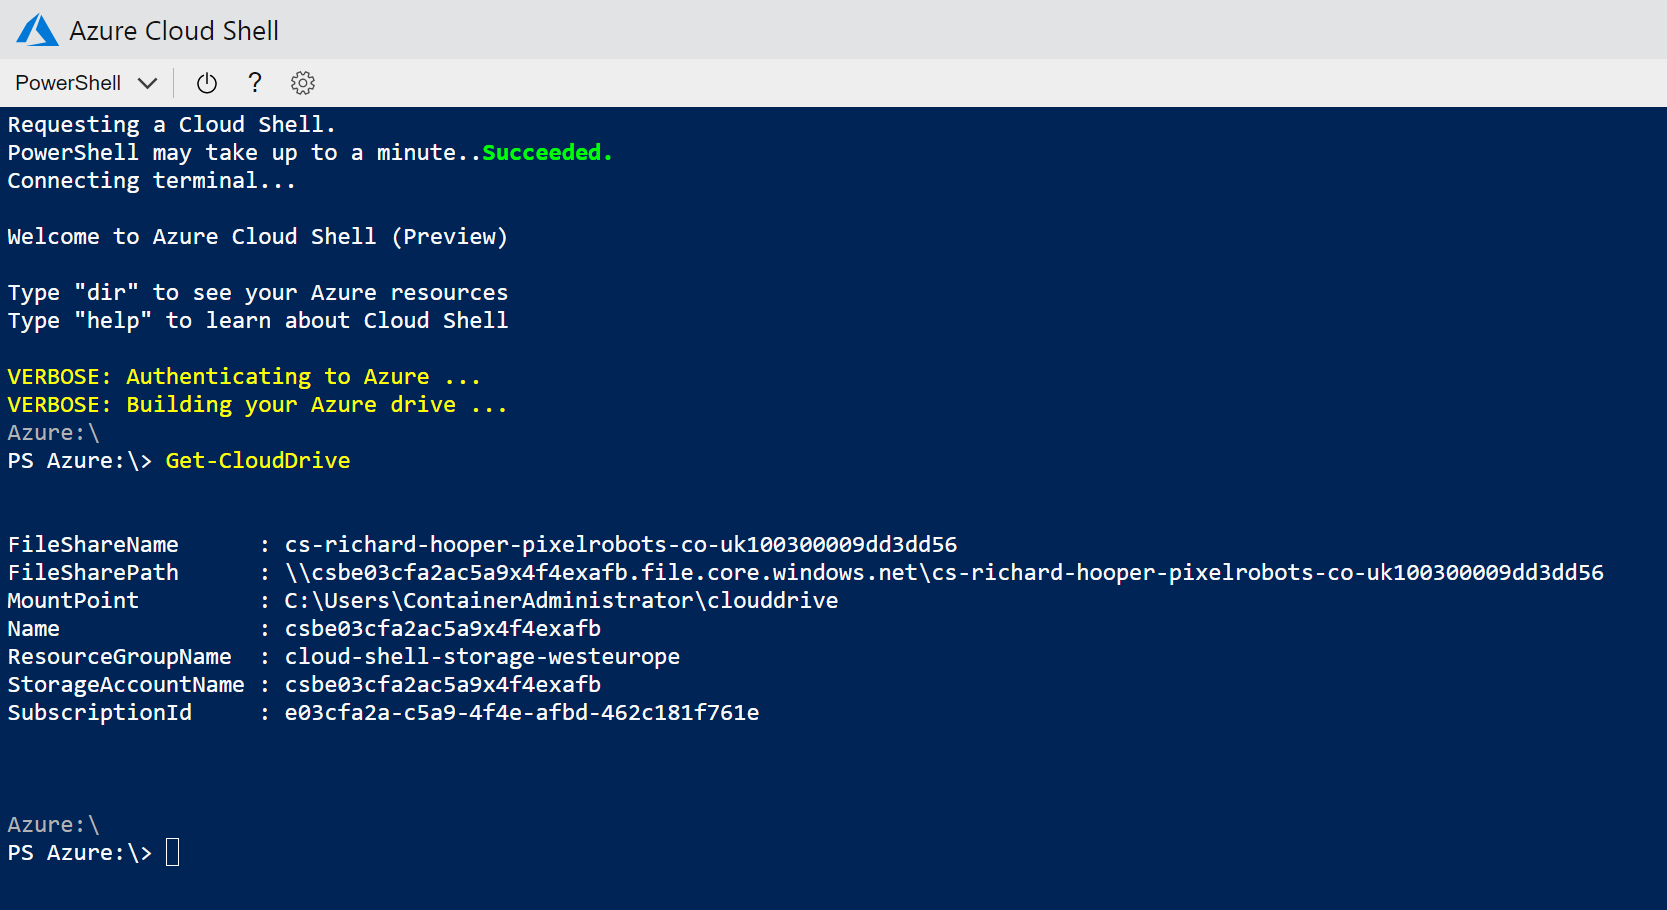
Now use the CD command to navigate to your MountPoint

Now we can use the following commands to download, extract and move us to the Azure Stack Tools directory.
| invoke-webrequest https://github.com/Azure/AzureStack-Tools/archive/master.zip -OutFile master.zip | |
| expand-archive master.zip -DestinationPath . -Force | |
| cd AzureStack-Tools-master |

Now we can import the new Azure Stack Policy module. Type the following command in the PowerShell window
| Import-Module .\Policy\AzureStack.Policy.psm1 |

Apply the Policy to the Subscription
For this bit, we are going to need to know your Azure Subscription Name.
If you are not sure of your Azure Subscription Name to use the following command to display it
| Get-AzureRMSubscription |

Now we have that we can use the following command to apply the default Azure Stack policy against your Azure subscription. Just make sure you can the Azure Subscription Name with your Azure subscription.
| $s = Select-AzureRmSubscription -SubscriptionName "<Azure Subscription Name>" | |
| $policy = New-AzureRmPolicyDefinition -Name AzureStackPolicyDefinition -Policy (Get-AzsPolicy) | |
| $subscriptionID = $s.Subscription.SubscriptionId | |
| New-AzureRmPolicyAssignment -Name AzureStack -PolicyDefinition $policy -Scope /subscriptions/$subscriptionID |

Apply policy to Resource Group
You might not want to apply the policy to the whole subscription. If that is the case you can apply it to a resource group. For this, you will need to know the name of the Resource group you want to apply the Azure Stack Policies to and the Azure Subscription Name. Once you have both use the following commands to apply the policies. Just make sure you change myRG01 and Azure Subscription Name to your resource group and subscription name.
| $rgName = 'myRG01' | |
| $s = Select-AzureRmSubscription -SubscriptionName "<Azure Subscription Name>" | |
| $policy = New-AzureRmPolicyDefinition -Name AzureStackPolicyDefinition -Policy (Get-AzsPolicy) | |
| New-AzureRmPolicyAssignment -Name AzureStack -PolicyDefinition $policy -Scope /subscriptions/$subscriptionID/resourceGroups/$rgName |

Lets Check the Portal
Log into the Azure portal
Navigate to your resource group and then click policies

You will see that we have two policies applied. One for the whole subscription and one for the resource group.
Remove Azure Stack Policies
To remove the policy from the resource group you just need to use the following commands. As before just make sure you change to match your resource group and subscription name.
| $rgName = 'myRG01' | |
| $s = Select-AzureRmSubscription -SubscriptionName "<Azure Subscription Name>" | |
| Remove-AzureRmPolicyAssignment -Name "AzureStack" -Scope /subscriptions/$subscriptionID/resourceGroups/$rgName |

To remove it from the Subscription in the PowerShell Shell use the following command making sure to replace the subscription name with your own.
| $s = Select-AzureRmSubscription -SubscriptionName "<Azure Subscription Name>" | |
| Remove-AzureRmPolicyAssignment -Name "AzureStack" -Scope /subscriptions/$subscriptionID |

And that’s it you have now managed to set and remove the Azure Stack Policy in Azure using the Azure Cloud Shell.
I hope you found this article helpful. Any questions please leave a comment.

2 Comments
Nick Colyer · August 6, 2019 at 6:13 pm
This is awesome. Took me forever to get a Dev kit to demonstrate to customers so this is a nice simple way to demonstrate to those considering Azure Stack.
Pixel Robots. · August 7, 2019 at 8:33 pm
Glad it might help.