What is new in Active Directory on Server 2016?
We have a few new features to play with in Windows Server 2016 regarding Active Directory. Some of them being time-based group membership, privileged access management, and Microsoft Passport to name a few. I am not going to go into too much detail in this post about them, but I will be creating another blog post to provide more information. In the meantime, if you would like to read up about them you can do with this link. https://technet.microsoft.com/en-us/windows-server-docs/identity/whats-new-active-directory-domain-services
Nearly every SysAdmin will know how to build a new Forest and join Domain controllers using the GUI, but I like PowerShell and less mouse clicks. At work recently I was tasked with installing a new AD forest for a customer and decided that I will use some PowerShell to make this install and future installs simpler for myself.
PowerShell Bits!
First things first we need to open PowerShell with elevated privileges.
For this guide, I am using PowerShell ISE.
Install ADDS
Open Powershell ISE with elevated credentials.

Copy the below code into the ISE window.
| # Install ADDS and all management tools | |
| Write-Host "Installing ADDS" | |
| Add-WindowsFeature -Name “ad-domain-services†-IncludeAllSubFeature -IncludeManagementTools -verbose |

Click the green run button or press F5.
Once complete ADDS has been Installed.
Delete all the code from the ISE window.
Create a new Forest
Copy the below code into the ISE window.
| # Create New Forest, add Domain Controller | |
| write-Host "Create Forest and Promote 1st DC" | |
| $domainname = Read-Host "Enter Forest Name eg: ad.pixelrobots.co.uk" | |
| $netbios = Read-Host "Enter Netbios Name eg: pixelrobots" | |
| Import-Module ADDSDeployment | |
| Install-ADDSForest ` | |
| -CreateDnsDelegation:$false ` | |
| -DatabasePath "C:\NTDS" ` | |
| -DomainMode "7" ` | |
| -DomainName:$domainname ` | |
| -DomainNetbiosName:$netbios ` | |
| -ForestMode "7" ` | |
| -InstallDns:$true ` | |
| -LogPath "C:\NTDS Logs" ` | |
| -NoRebootOnCompletion:$false ` | |
| -SysvolPath "C:\SYSVOL" ` | |
| -Force:$true |

Click the green run button or press F5.
You will be asked to enter a Domain Name. In this case, I will use AD.TESTPIXELS.CO.UK.
You will then be asked to Enter a Netbios Name. I have used TESTPIXELS.
You will now have to enter the DRSM Password twice. Store this in a safe place!
[themify_box style=”red warning”] You can even use this code to for Server 2012r2 and 2012. You will just need to change the -DomainMode and -ForestMode to either 6 for 2012r2 or 5 for 2012.[/themify_box] [themify_box style=”yellow comment”] If you want to store your SYSVOl, NTDS, and NTDS log files to a different location, you can! You just need to amend the code above and change the locations.
[/themify_box]
The Force:$Trure at the bottom of the code basically just forces a reboot after it has completed.
Once the server has rebooted login with your domain credentials.
You now have a new Active Directory Forest using PowerShell.

Renaming Default-First-Site and add subnets
Open PowerShell ISE with elevated credentials.
Copy the below code into the ISE window.
| # Change Default-First-Site-Name | |
| Write-Host "Change Name of Default-First-Site" | |
| $Sitename = read-host "Enter new site name to replace Default-First-Site" | |
| $configNCDN = (Get-ADRootDSE).ConfigurationNamingContext | |
| $siteContainerDN = ("CN=Sites," + $configNCDN) | |
| $siteDN = "CN=Default-First-Site-Name," + $siteContainerDN | |
| Get-ADObject -Identity $siteDN | Rename-ADObject -NewName:$sitename |

Click the green run button or press F5.
You will be asked for a new site name. It can be whatever you like as long as it can be used by DNS.

Your Default-First-Site has been renamed.

To add a subnet to your new site use the code below.
First, remove all code from ISE window.
Copy the below code into the ISE window.
| # Add subnet to sites and service | |
| Write-Host "Add Subnet to Site" | |
| $Subnet = read-host "Enter subnet in format 10.10.10.0/24" | |
| $desc = read-host "Enter description eg: 10.10.10.0/255.255.255.0" | |
| New-ADObject -Name:$subnet -Type subnet -Description:$desc -OtherAttributes @{location="Yellow-Pixel";siteObject="CN=Yellow-Pixel,CN=Sites,CN=Configuration,DC=ad,DC=testpixels,DC=co,DC=uk"} -Path "CN=Subnets,CN=Sites,CN=Configuration,DC=ad,DC=testpixels,DC=co,DC=uk" |

You will be asked to enter subnet in the style of 10.10.10.0/24
You will then be asked to enter a description in the style of 10.10.10.0/255.255.255.0
[themify_box style=”red warning”] You will need to slightly change the above code so it references the name of the site you want to add the subnet to and also the site object and path.Leave a comment if you get stuck!
[/themify_box]

Reverse DNS Lookup Zone
You might want to add an Active Directory Integrated Reverse DNS Lookup Zone. If you do use the code below.
Just run it in an elevated PowerShell ISE window.

| ### Add Reverse DNS Looup Zone | |
| $rDNS = read-host "Enter Reverse DNS network ID eg: 10.10.10.0/24" | |
| Add-DnsServerPrimaryZone -NetworkId:$rDNS -ReplicationScope Forest |

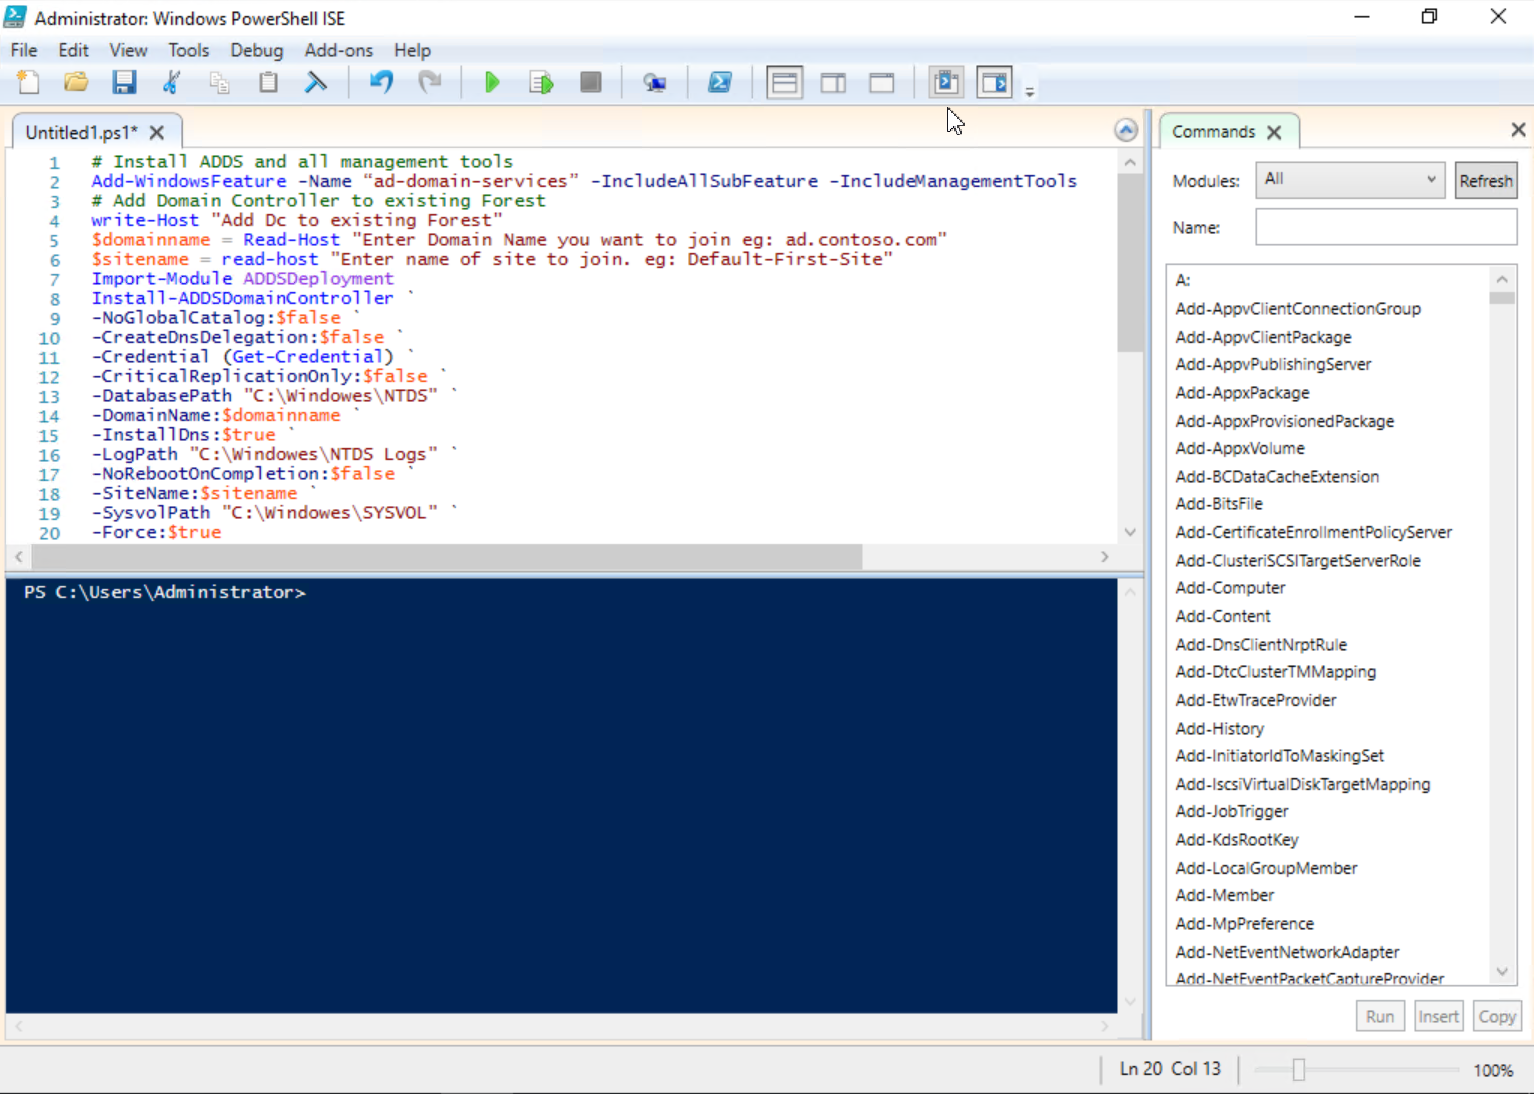
Add another DC to your Forest
This is easier! All you have to do is run the code below.
| # Install ADDS and all management tools | |
| Add-WindowsFeature -Name “ad-domain-services†-IncludeAllSubFeature -IncludeManagementTools | |
| # Add Domain Controller to existing Forest | |
| write-Host "Add Dc to existing Forest" | |
| $domainname = Read-Host "Enter Domain Name you want to join eg: ad.contoso.com" | |
| $sitename = read-host "Enter name of site to join. eg: Default-First-Site" | |
| Import-Module ADDSDeployment | |
| Install-ADDSDomainController ` | |
| -NoGlobalCatalog:$false ` | |
| -CreateDnsDelegation:$false ` | |
| -Credential (Get-Credential) ` | |
| -CriticalReplicationOnly:$false ` | |
| -DatabasePath "C:\Windowes\NTDS" ` | |
| -DomainName:$domainname ` | |
| -InstallDns:$true ` | |
| -LogPath "C:\Windowes\NTDS Logs" ` | |
| -NoRebootOnCompletion:$false ` | |
| -SiteName:$sitename ` | |
| -SysvolPath "C:\Windowes\SYSVOL" ` | |
| -Force:$true |
You will be asked to enter the Domain name you want to join.
You will then be asked to Enter the Site name you want to join. In my case Yellow-Pixel.
You will then be asked to supply some credentials. Enter the new Forests Domain Admin credentials.

You will now need to enter the DRSM password twice. Just use the same one from when you created the Forest.

The server will restart and you will now be able to log on with domain credentials.


1 Comment
Jose Lopez · January 6, 2018 at 1:11 am
Another great article Richard. Very well written and presented.